
Apache CloudStack is an open-source cloud infrastructure management platform that simplifies the deployment, management, and scaling of virtualized workloads. In this guide, we’ll walk through the process of creating a Virtual Machine (VM) using the default network in Apache CloudStack.
In this guide, we will walk you through the process of creatinga Virtual Machine (VM) using the default network in Apache CloudStack.
Firstly, let’s outline the process of creating a Virtual Machine (VM) using the default network in Apache CloudStack.
Prerequisites
Before you begin, ensure that you have the following:
Access Credentials: Ensure you have the necessary credentials to log in to the CloudStack management interface.
Step 1: Log in to CloudStack Management Console
To begin, open your web browser and navigate to the CloudStack Management Console. Then, log in with your credentials.
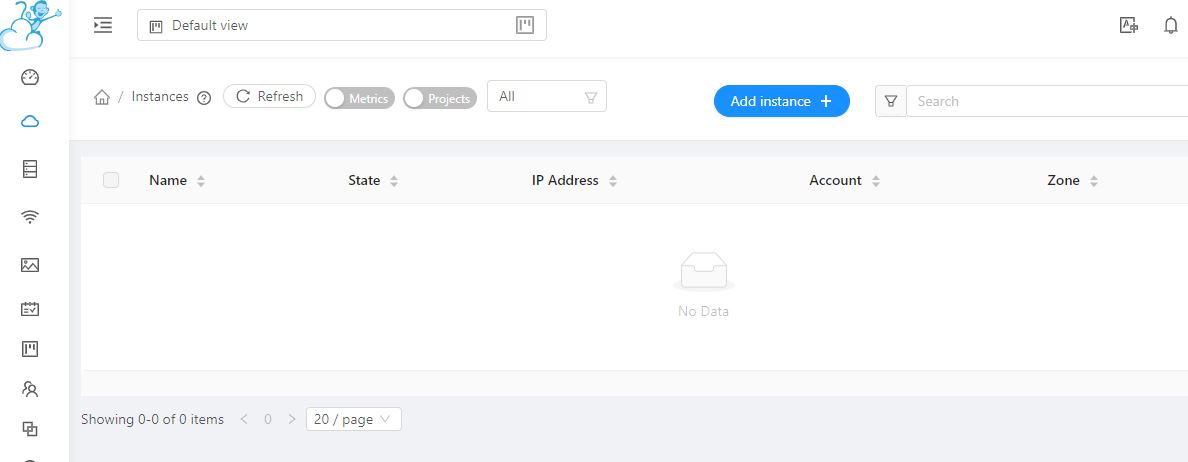
Step 2: Navigate to “Instances”
Once logged in, next, navigate to the “Instances” section. This is where you’ll manage your virtual machines.
Step 3: Initiate Instance
Select the “Add Instance” option to commence the creation of a new instance.
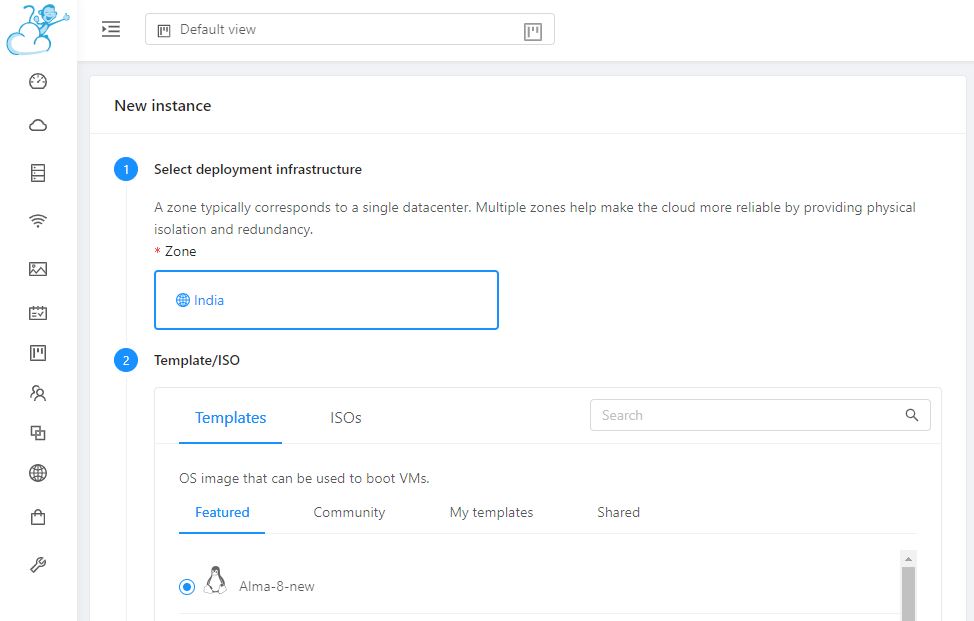
Step 4: Choose the “Default” Zone
– Select the “Default” zone from the available zones. The default zone usually represents the basic configuration for CloudStack.
Step 5: Choose the Template
– Select a template for your VM. The template contains the operating system and other configuration details. Ensure that the template is compatible with the default network.
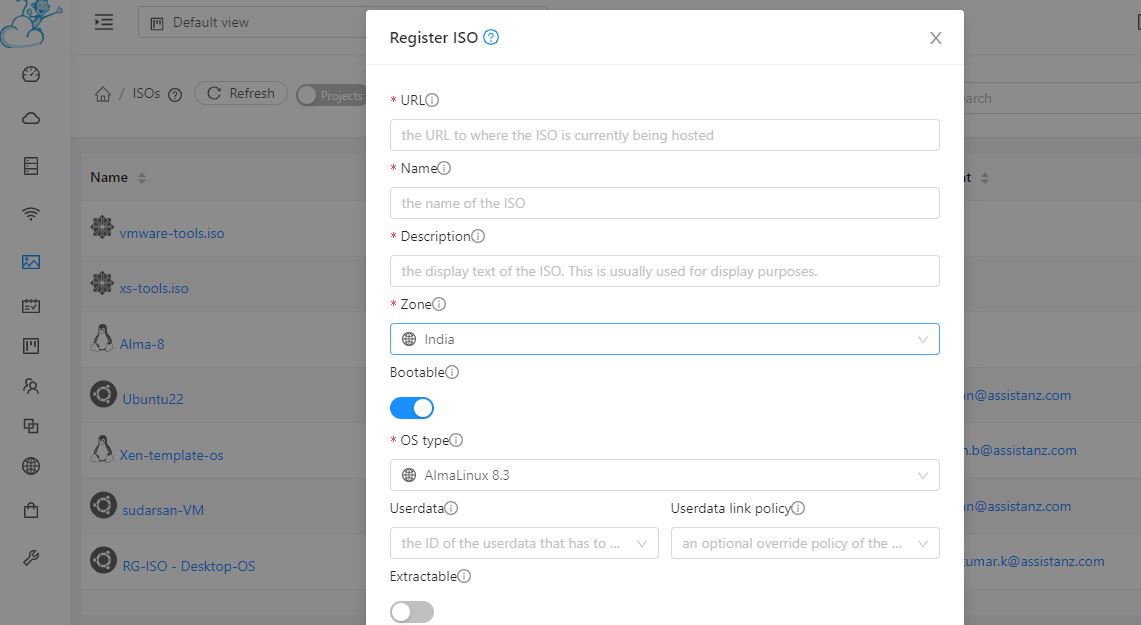
(Optional): Add ISO for Installation
If you need to install an operating system using an ISO image, follow these additional steps:
– Navigate to the “Templates” section on the left-hand navigation bar.
– In Select View, choose ISOs.
– Click on “Register ISO.”
– On the “Add ISO” screen, input the following details:
– URL: The URL hosting the ISO image.
– Name: A brief identifier for the ISO image
. – OS Type: Choose the operating system type.
Step 6: Select the Compute Offering
Choose a Compute offering that suits your requirements. The Compute offering defines the compute resources (CPU, memory, etc.) allocated to your VM.
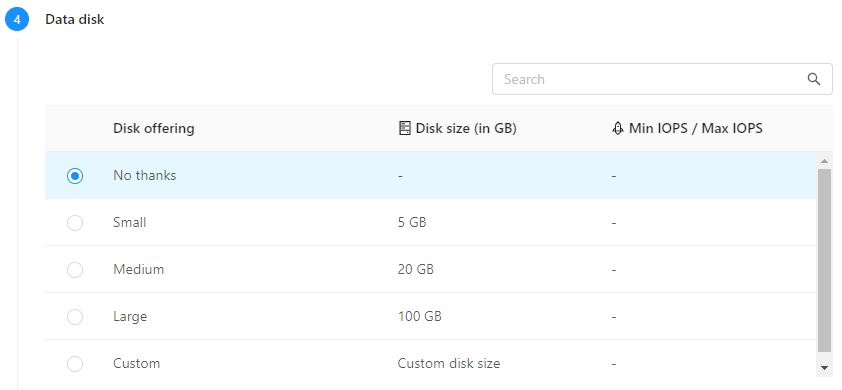
Step 7: Select the Data disk Offering
Choose a Disk Offering that suits your requirements.
Step 8: Configure Network Settings
In the network settings, Click create new network and add the network details in the isolated section
Provide the following information for creating an isolated Network:
– Name: Specify the name for the network.
– Description: Provide a description for the network.
– Zone: Indicate the zone where you are configuring the guest network.
– Network offering: select Offering for isolated networks with Source Nat service enabled and click OK button.

Step 9: Fill details
Provide the instance name and activate the “Start instance” option. To initiate the instance, click on the “Launch Instance” button.
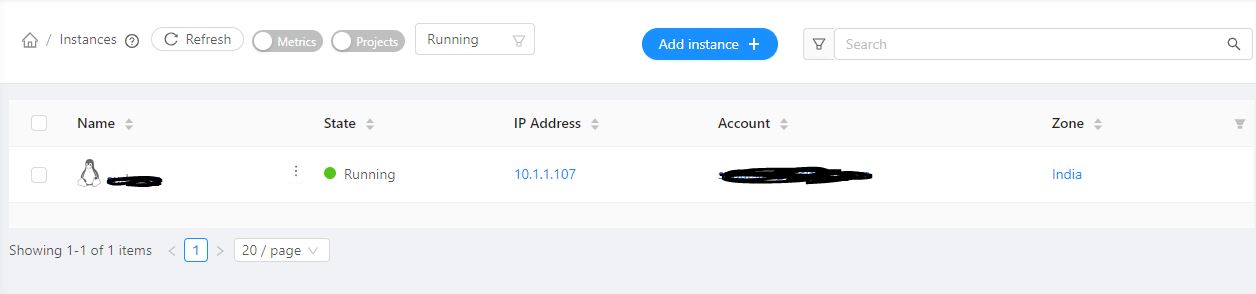
CloudStack will now start creating your virtual machine. Monitor the progress in the CloudStack interface. Once the VM is successfully deployed, you’ll see its status as “Running.”
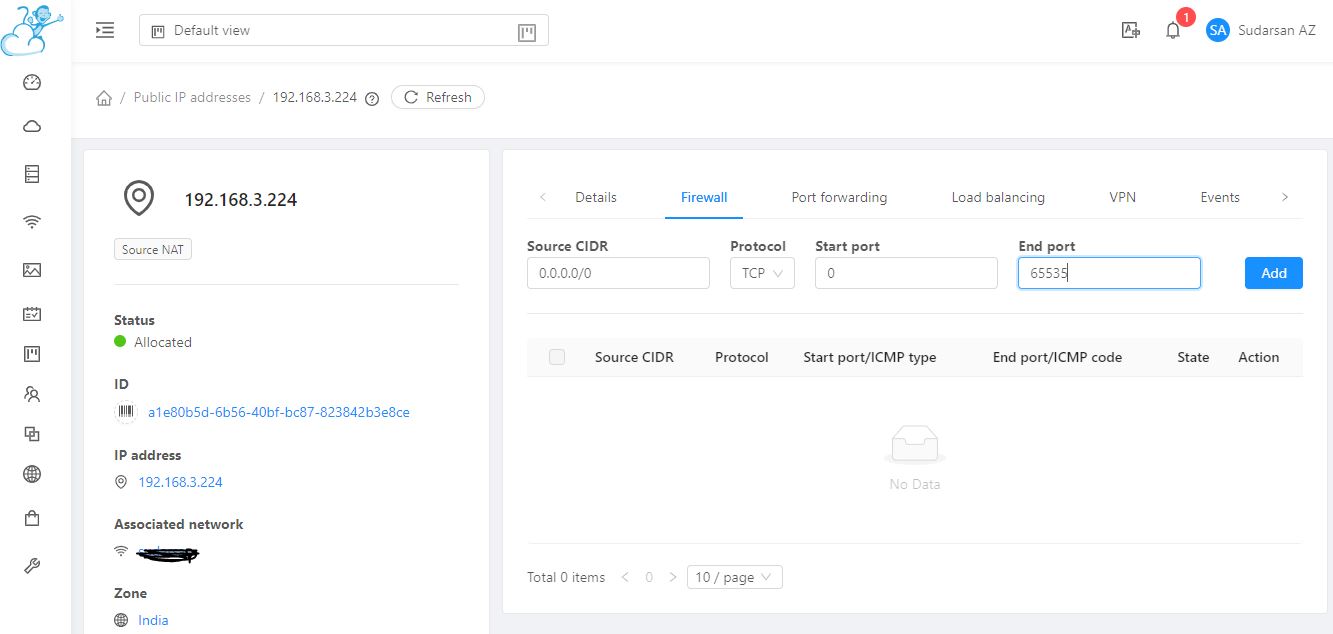
Step 10: Manage Public IP Addresses
- Once Vm is deployed need to add firewall and port forwarding to the allocated IP address.
- Navigate to the “Public IP Addresses” section in the CloudStack Management Console.
Add Firewall Rule:
– Add a new firewall rule to permit the desired traffic to and from your VM. Specify protocols, ports, and source/destination details as needed.
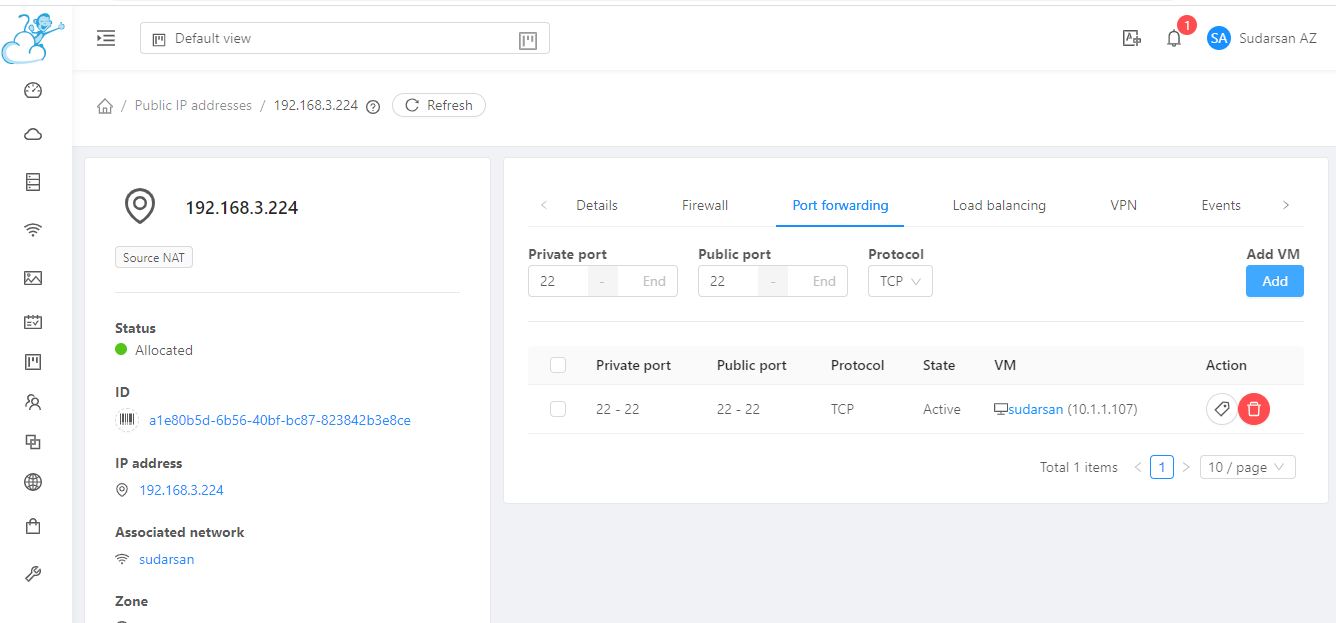
Set Up Port Forwarding:
– Create a port forwarding rule to direct external traffic to specific ports on your VM. Input details such as public and private ports, protocol, and the associated VM.
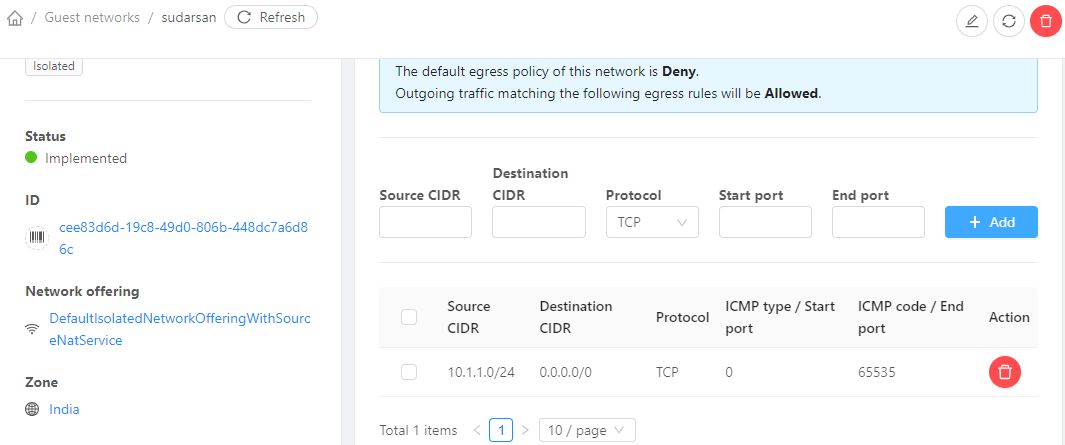
Add Egress Rules:
– Navigate to the “Network” section using the left navigation menu.
– Under “Select view,” option for “Guest networks,” then select the desired Guest network.
– Access the “Egress Rules” tab to add rules specifying the type of traffic permitted to exit instances in this guest network.
CIDR: (Specify via CIDR only) Direct traffic exclusively to IP addresses within a specific address block by entering a CIDR or a list of CIDRs separated by commas. The CIDR denotes the base IP address of the destination (e.g., 192.168.0.0/22). To allow all CIDRs, set it to 0.0.0.0/0.
Protocol: Indicates the networking protocol used by instances for outgoing traffic. TCP and UDP are commonly employed for data exchange and end-user communications, while ICMP is typically used for error messages or network monitoring data.
Start Port, End Port: (Applicable to TCP, UDP only) Specify a range of listening ports serving as the destination for outgoing traffic. When opening a single port, ensure the same number is used in both fields.
ICMP Type, ICMP Code: (Applicable to ICMP only) Define the type of message and error code transmitted within the ICMP protocol.
Once the VM is running and network setup is completed , you can access it using the provided IP address. Use SSH or any other preferred method to connect to your VM.
Congratulations! You have successfully created a Virtual Machine using the default network in Apache CloudStack.
Take a look of next article : Steps to Create Ubuntu Template.